What should I do when I receive my Gift Trees?
Your trees will arrive clearly labeled as Live Plants. Open the box and visually inspect the trees to make sure they’ve all arrived in good condition. If you need to store them for a few days, make sure the open box is stored in the refrigerator (or at least kept in a cool place like a garage or basement). Do not freeze your trees or leave them in the car or direct sunlight.
Planting your new Tree
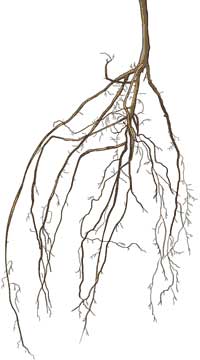
The benefits of bare-root trees
Our trees are delivered with natural bare roots which have been dipped in hydrating gel prior to shipment to keep the roots moist and healthy. As their abundant, fibrous roots aren't confined by a container, bare-root trees get off to a more vigorous start compared to containerized roots which typically need more time to adjust to transplanting. Bare-root trees typically surpass the size of larger containerized trees in only a few years.
Step by Step
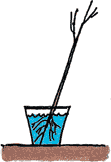
1. Unpack your trees, remove all packing materials, carefully untangle the roots and soak the roots in water 3 to 6 hours. Do not allow the roots to dry out.
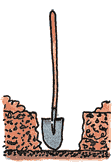
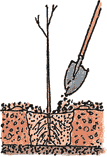
2. Dig a hole, wider than seems necessary, so the roots can grow outward without crowding. Remove any grass within a 3-foot circular area. To aid root growth, turn soil in an area up to 3 feet in diameter.
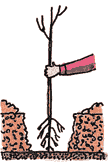
3. Plant the tree at the same depth it stood in the nursery, with plenty of room for the roots. Partially fill the hole, firming the soil around the lower roots. Do not add soil amendments such as peat or bark. Do not use fertilizer, potting soil, or chemicals on your new trees.
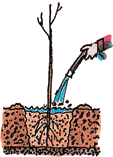
4. Shovel in the remaining soil. It should be firmly but not tightly packed. Construct a water-holding basin around the tree. Give the tree plenty of water.
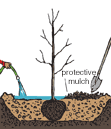
5. After the water has soaked in, spread protective mulch two inches deep in a 3-foot diameter area around the base of the tree, but not touching the trunk.
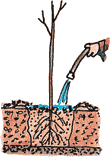
6. The soil and mulch around your trees should be kept moist but not soggy. During dry weather, generously water the tree every 7 to 10 days during the first year. Water slowly at the drip line.
Planting Location: To give your trees the best start, we recommend planting in a protected area with worked-up soil such as a garden. After 1 to 2 years, simply transplant to the permanent location when the trees are dormant.
Signs of Dormancy: Plant or transplant your trees when they are dormant. In fall: after the leaves have dropped or, on evergreen trees, when light-brown clusters form on the top. In early spring: before leaves or new growth appear.
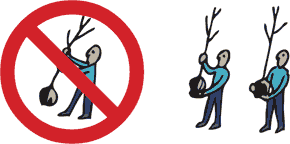
Carefully Separate Your Trees: There will be more than one tree in your package. Remove the plastic bag around the roots and the twist tie holding your trees together. Separate your trees, carefully untangling the roots. Please note that the roots have been covered with a hydrating gel which keeps them moist during shipment.
Depth and Distance of Holes: Measure the roots of each tree. Dig one hole for each tree 1 foot wide and 1 inch deeper than the roots. Holes should be 2-1/2 feet apart.
 Fertilizer? Do not use fertilizer, potting soil, or chemicals on your baby trees. Such products will kill your young trees.
Watering: Keeping your baby trees watered is important during their first year. Keep the soil and mulch moist but not soggy. In dry weather, you should water generously every 7 to 10 days. The water should soak into the soil and mulch. Avoid watering so much that you see standing water.
Protection: We recommend putting a fence (such as chicken wire) around your trees if your site is a feeding ground for rabbits, deer, or other wildlife.
Trees purchased from nurseries are often delivered in a pot or container. These instructions are for planting containerized trees.
Instructions
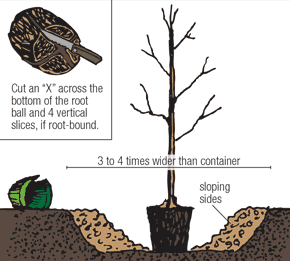
1. Dig a hole 3 to 4 times wider than the container. The hole should have sloping sides like a saucer to allow for proper root growth.
2. Carefully remove the tree from the container keeping the soil around the roots intact. It helps to tap the outside of the container to loosen the edge. Carefully slide the tree from the container. Don't yank the tree out of the container as this can separate the roots from the tree.
3. Sometimes containerized trees become root-bound or the roots look like they're about to circle the root ball. If your tree is like this, cut an X across the bottom of the root ball and four vertical slices along the sides of the root ball with a sharp knife.
4. Set the tree in the middle of the hole. Avoid planting the tree too deep. If the root collar sits below the top of the hole, compact some soil under the tree so that the root flare at the base of the trunk is slightly above ground level. Using some soil, secure the tree in a straight position, then fill and firmly pack the hole with the original soil, making sure there aren't any air pockets. Keep backfilling until the soil is just below the root collar.
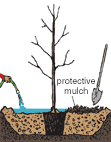
5. Create a water-holding basin around the hole and give the tree a good watering. After the water has soaked in, spread protective mulch 2–4 inches deep in a 3-foot diameter area around the base of the tree, but not touching the trunk.
6. The soil and mulch around your trees should be kept moist but not soggy. During dry weather, generously water the tree every 7 to 10 days during the first year. Water slowly at the dripline.
7. Remove any tags and labels from the tree as these will affect the tree as it grows. You may need to prune any broken or dead branches.
 Fertilizer? Do not use fertilizer, potting soil, or chemicals on your newly planted trees. Such products will kill your young trees.
Watering: Keeping your trees watered is important during their first year. Keep the soil and mulch moist but not soggy. In dry weather, you should water generously every 7–10 days. The water should soak into the soil and mulch. Avoid watering so much that you see standing water.
How to Plant Balled and Burlapped Trees
Instructions
1. You’ll need to dig a saucer-shaped hole. If you can, rototill an area five times the diameter and as deep as the root ball. The prepared soil will make the hole easier to dig and encourage root growth. Measure the depth of the root ball to make sure the root collar will be at or a little above ground level when your tree is planted.
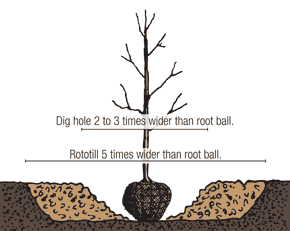
2. Dig the hole 2 or 3 times as wide and as deep as the root ball. The hole should have sloping sides, and don’t disturb the soil at the bottom of the hole.
3. Set the tree in the center of the hole. When moving the tree, handle it by the root ball. Don't move or lift the tree by the trunk as this can cause the root ball to separate from the trunk. Check the planting depth. If the root collar is below ground level, compact some soil under the root ball to bring the root collar up to slightly above ground level.
4. Once the tree is in position, use wire cutters to cut vertically up the side the wire basket and peel it away. Remove all the rope and twine from the ball and all the nails that hold the burlap together. Pull the burlap back and cut away any loose material. Don't worry about regular burlap under the root ball. It can stay put. But vinyl or treated burlap should be removed completely.
5. Make sure your tree is straight and then firmly pack the original soil around the root ball making sure there aren't any air pockets. Keep backfilling until the soil is just below the root collar.
6. Create a water-holding basin around the tree and give the tree a good watering. After the water has soaked in, spread protective mulch 2-4 inches deep covering the entire area of backfilled soil, keeping the mulch 4 inches away from the trunk.
7. The soil and mulch around your trees should be kept moist but not soggy. During dry weather, generously water the tree every 7 to 10 days during the first year. Water slowly at the dripline.

8. Remove any tags and labels from the tree as these will affect the tree as it grows. You may need to prune any broken or dead branches.